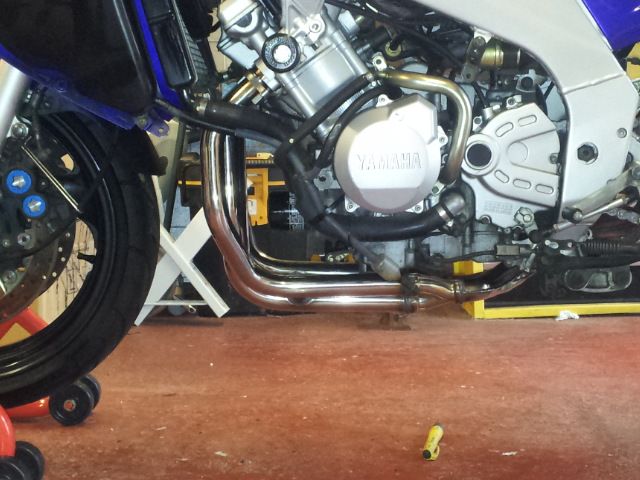
Fitted new downpipes.
+4
Rosco
Stu
0ldcat
johnelcoat
8 posters
Page 1 of 1
 Fitted new downpipes.
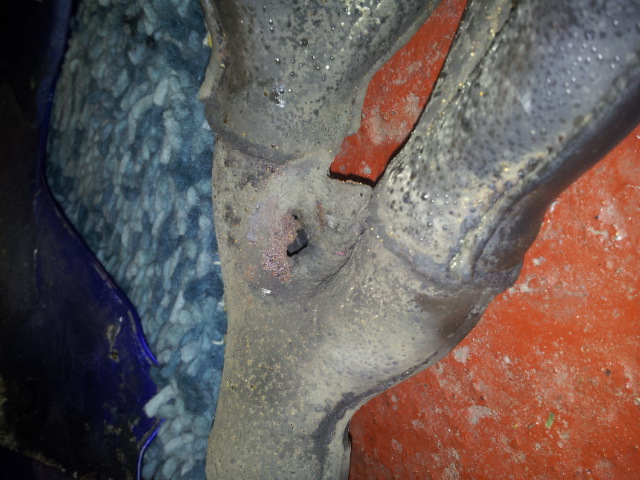
A while ago I removed my downpipes because they had holed and I ordered some new direct from Delkevic.
So, my new Delkevic pipes arrived the day after I'd ordered them and very nice and shiney they are too!
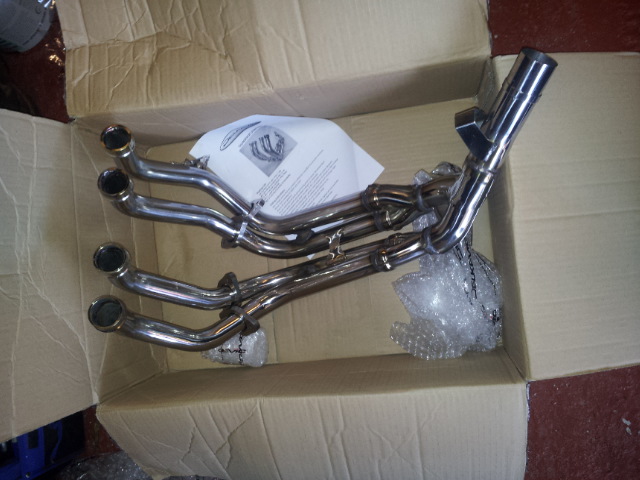
They came with all gaskets and clamps needed, as well as the 8 nuts and spring washers £184.99 with a lifetime guarantee. Anyway I thought I'd do a little write up. Now bear with me, as I've never done one before.
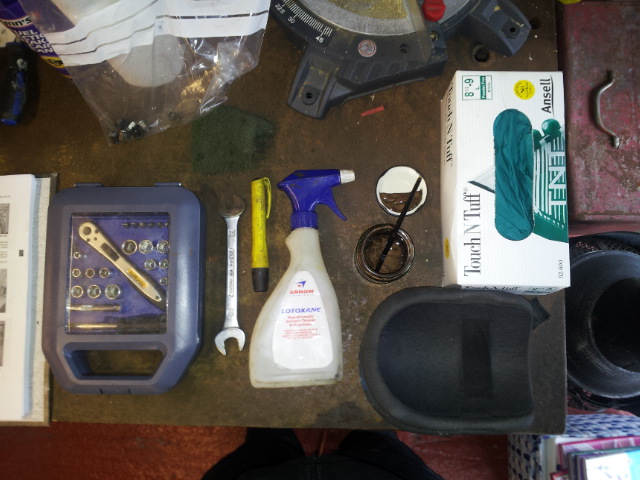
Tools/gear needed.
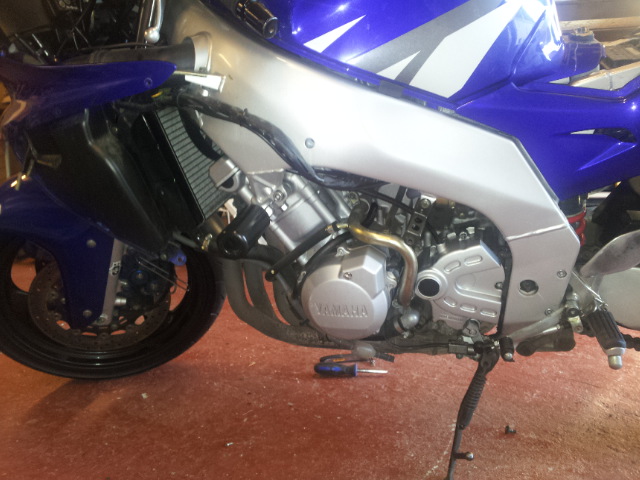
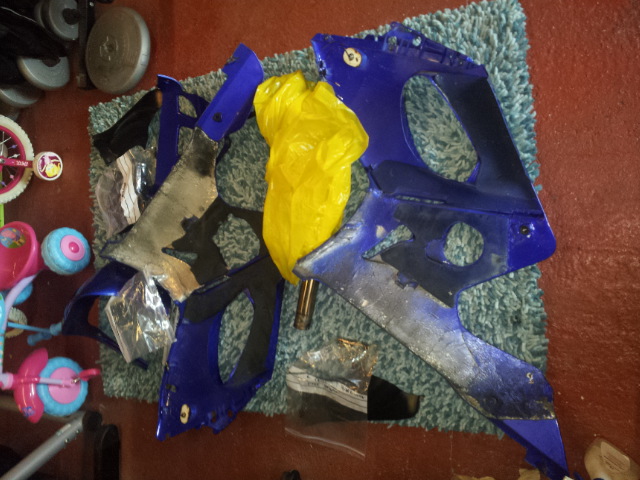
First off I started by removing the fairings. Now I've never done this before, and it was fairly straightforward, apart from the little rubber gromit on the inside of the fairing that isn't shown in the haynes!
I loosened the rear pipe holding bolt, but left it in slack. Next up I sprayed the pipe nuts with WD40 and did what any self respecting, budding mechanic would do and had a brew. This allowed the nuts to ease and they came of relatively easy apart from one which I'm pretty sure was about to shear and then loosened. A quick tip is to try them and if one side of the header clamp nuts is tighter than the other, then if you can get the least tight one loose the tightest will slacken easy, if that makes sense. Once these were all removed apart from 2 to hold the pipe, I removed the rear bolt and supporting the pipes I then removed the last two nuts and the pipes fell away easily. I then split the silencer and connecting pipe from the downpipes and cleaned the silencer and connector pipe with degreaser.
The next part is to clean up the exhaust ports making sure that the gaskets are all removed and clean the ports. I then robbed a paint brush off the wife and painted the header bolts with copperslip grease and at the same time I put a smear on the new gaskets to hold them in whilst offering up the new pipes.
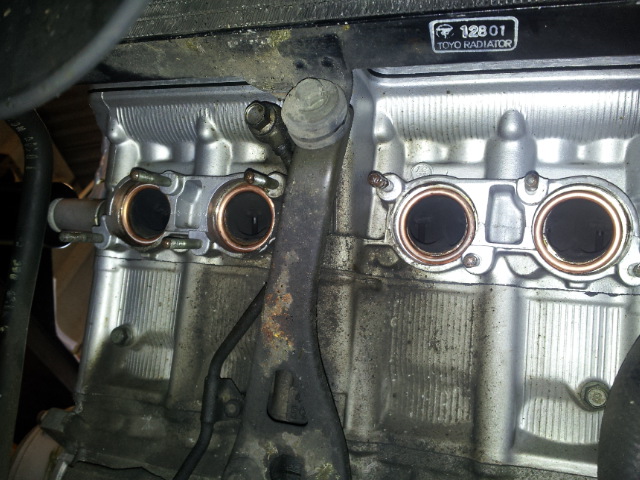
When offering up the pipes make sure that the rear bracket is in place behind the bracket on the bike and the bolt in loose, as if it isn't you won't get the pipes in.

The header pipes can now start to be put in the ports. The clamps can now be positioned over the bolts and the washers and nuts put on loose to hold in position.
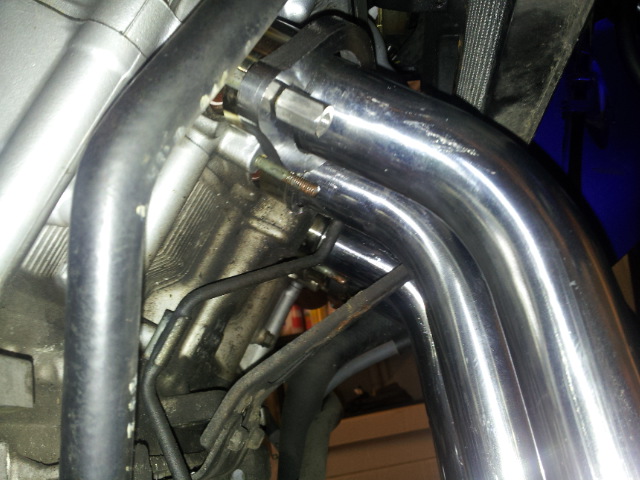
These nuts are only supposed to be 10Nm, now as I deal with this kind of measurement everyday at work, I know how much this is, but to most people this means didelly squat. 10Nm isn't a lot so don't be hanging off them, but at the same time they dont want to be loose and these copper washers compress a lot. The best way I found was to tighten the nuts little by little starting at the top of one and then the bottom and working across, so as not to tighten one and then get the rest cocked over. Whilst tightening, the pipes will jump a little as they find there way in, this is normal don't panic. Eventually you get to what I like to technically call a "nip" they are now tight.
Now the header nuts are on and tight the rear bolt can be tightened. I then offered up the connecting pipe and silencer and it slipped over like a glove, although the supplied graphite gasket for the clamp doesn't fit my exhaust, it didn't need one as the fit was snug.
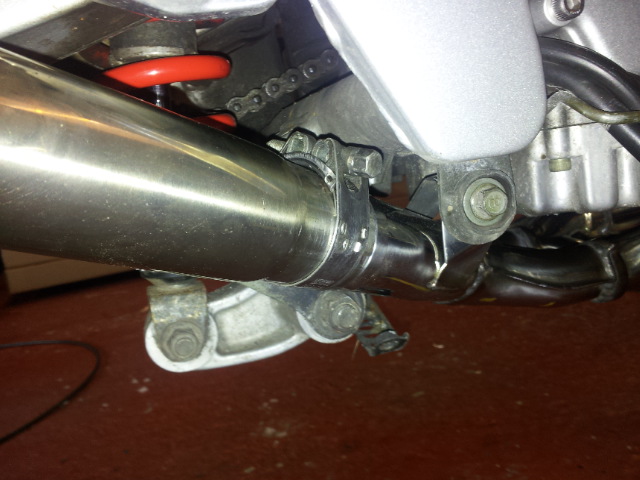
Then it was just a matter of putting the clamp back on the silencer and making sure it wasn't going to foul the swing arm.
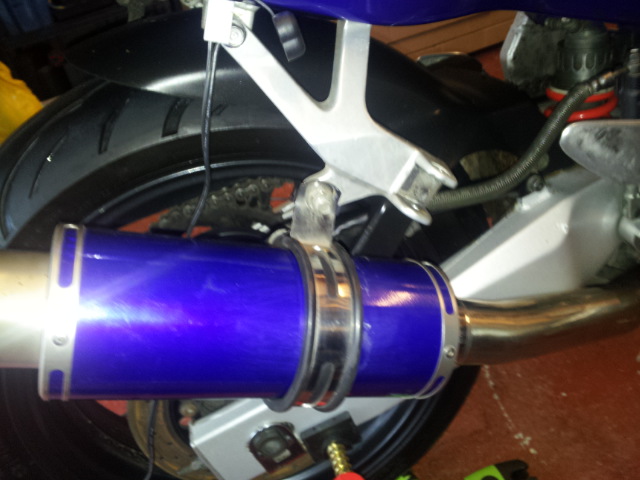
Before I tested it for leaks I wiped the pipes down with the degreaser, because the greasy fingerprints will burn onto the pipes once the engine heats the them, and will spoil the look. I then ran the cat to temperature and it was sweet as a nut.
I also think it looks cool too.
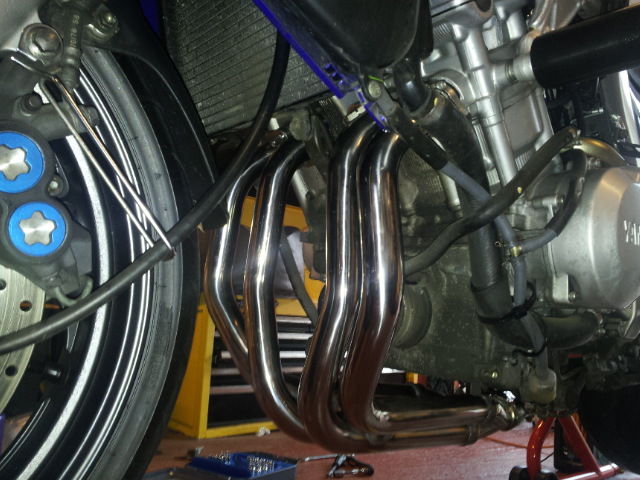
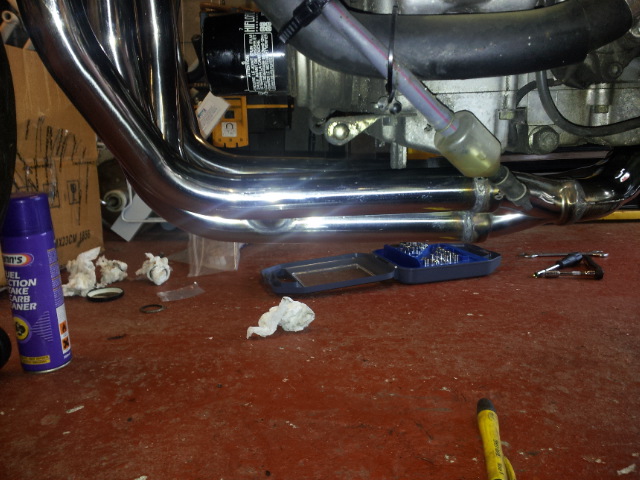
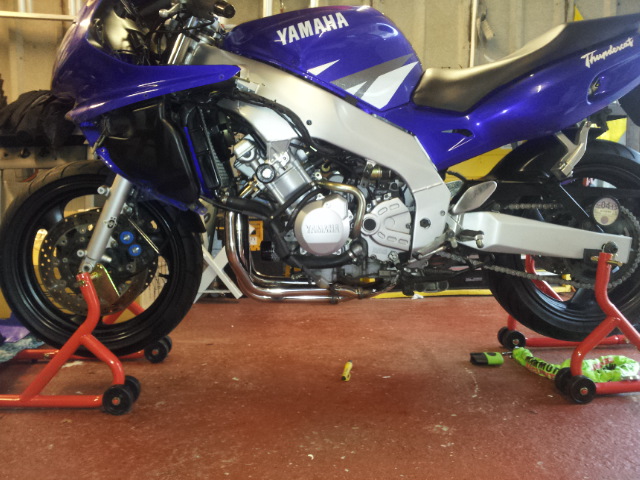
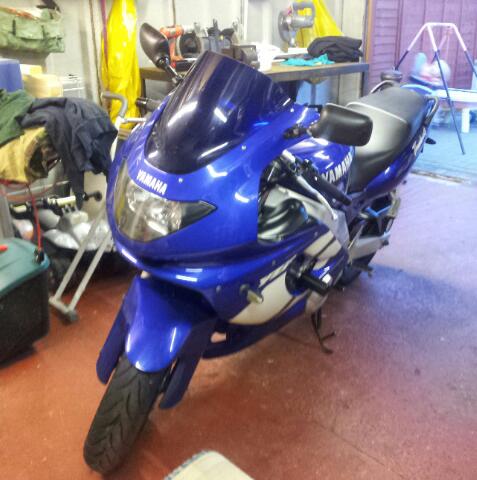
It was then just a matter of replacing all the fairings.
Well, I hope that was o.k and almost useful
John.

So, my new Delkevic pipes arrived the day after I'd ordered them and very nice and shiney they are too!

They came with all gaskets and clamps needed, as well as the 8 nuts and spring washers £184.99 with a lifetime guarantee. Anyway I thought I'd do a little write up. Now bear with me, as I've never done one before.
Tools/gear needed.
- 10mm socket and driver of some kind (for the pipe nuts/connector pipe clamp) I used a 1/4 ratchet withan extension.
12mm socket (for the rear bolt)
14mm spanner/socket (for my silencer clamp, may not be necessary for yours)
phillips screwdriver to remove the fairings.
degreasing agent (I use Lotoxane, but any will do)
Copperslip grease
rubber gloves
knee pads

First off I started by removing the fairings. Now I've never done this before, and it was fairly straightforward, apart from the little rubber gromit on the inside of the fairing that isn't shown in the haynes!


I loosened the rear pipe holding bolt, but left it in slack. Next up I sprayed the pipe nuts with WD40 and did what any self respecting, budding mechanic would do and had a brew. This allowed the nuts to ease
 and they came of relatively easy apart from one which I'm pretty sure was about to shear and then loosened. A quick tip is to try them and if one side of the header clamp nuts is tighter than the other, then if you can get the least tight one loose the tightest will slacken easy, if that makes sense. Once these were all removed apart from 2 to hold the pipe, I removed the rear bolt and supporting the pipes I then removed the last two nuts and the pipes fell away easily. I then split the silencer and connecting pipe from the downpipes and cleaned the silencer and connector pipe with degreaser.
 The next part is to clean up the exhaust ports making sure that the gaskets are all removed and clean the ports. I then robbed a paint brush off the wife and painted the header bolts with copperslip grease and at the same time I put a smear on the new gaskets to hold them in whilst offering up the new pipes.

When offering up the pipes make sure that the rear bracket is in place behind the bracket on the bike and the bolt in loose, as if it isn't you won't get the pipes in.

The header pipes can now start to be put in the ports. The clamps can now be positioned over the bolts and the washers and nuts put on loose to hold in position.

These nuts are only supposed to be 10Nm, now as I deal with this kind of measurement everyday at work, I know how much this is, but to most people this means didelly squat. 10Nm isn't a lot so don't be hanging off them, but at the same time they dont want to be loose and these copper washers compress a lot. The best way I found was to tighten the nuts little by little starting at the top of one and then the bottom and working across, so as not to tighten one and then get the rest cocked over. Whilst tightening, the pipes will jump a little as they find there way in, this is normal don't panic. Eventually you get to what I like to technically call a "nip" they are now tight.
Now the header nuts are on and tight the rear bolt can be tightened. I then offered up the connecting pipe and silencer and it slipped over like a glove, although the supplied graphite gasket for the clamp doesn't fit my exhaust, it didn't need one as the fit was snug.

Then it was just a matter of putting the clamp back on the silencer and making sure it wasn't going to foul the swing arm.

Before I tested it for leaks I wiped the pipes down with the degreaser, because the greasy fingerprints will burn onto the pipes once the engine heats the them, and will spoil the look. I then ran the cat to temperature and it was sweet as a nut.
I also think it looks cool too.


It was then just a matter of replacing all the fairings.

Well, I hope that was o.k and almost useful
John.

johnelcoat- 5Bronze

-
 Status :
 Online Offline
Number of posts : 40
Hobbies : Mechanical Engineer
Humour : Slightly twisted with a hint of sarcasm
Registration date : 2012-10-27
 Re: Fitted new downpipes.
Nice write up. New downpipes look good.
Stu- 1Silver

-
 Status :
 Online Offline
Number of posts : 129
Hobbies : Engineer/Surfing
Registration date : 2011-04-03
 Re: Fitted new downpipes.
Great job...great write up 
Kudos
P.s your bike is too clean
Kudos

P.s your bike is too clean

Rosco- Admin2

-
 Status :
 Online Offline
Number of posts : 6662
Humour : Oh Go On Then
Registration date : 2008-11-06
 Re: Fitted new downpipes.
Just a quick thought after looking at fairings on the floor , might want to look into replacing the heat protection bit ( the silver foam looking thingy ma bob ) just incase

HEHORE- 1Gold

-
 Status :
 Online Offline
Number of posts : 526
Hobbies : pizza man
Humour : dirty
Registration date : 2011-10-30
 Re: Fitted new downpipes.
Yeah good spot, I thought it looked a bit ropey too, so I put some aircraft battle damage repair tape, similar metal type tape used for aircraft skin repairs, on and replaced the foam. Looks spanking now.

johnelcoat- 5Bronze

-
 Status :
 Online Offline
Number of posts : 40
Hobbies : Mechanical Engineer
Humour : Slightly twisted with a hint of sarcasm
Registration date : 2012-10-27
 Re: Fitted new downpipes.
Rosco wrote:P.s your bike is too clean
It was always too clean Ross!!
Good write up there John and I can see The Mistress is in good hands and being well looked after.

Snowcat- 6Gold

-
 Status :
 Online Offline
Number of posts : 2426
Hobbies : Aluminium & Stainless Steel Sales : Motorcycling, snooker, football, not going out
Humour : Dry, sarcastic, funny, bit cruel, p*ss taking
Registration date : 2011-09-28
 Re: Fitted new downpipes.
Yeah, it cleans up really nice and it's the best colours in my view. You don't have to worry steve I will take very good care of her 


johnelcoat- 5Bronze

-
 Status :
 Online Offline
Number of posts : 40
Hobbies : Mechanical Engineer
Humour : Slightly twisted with a hint of sarcasm
Registration date : 2012-10-27
 Re: Fitted new downpipes.
It's been nearly two years since you fitted these downpipes, are you still happy with them, any problems to report.
I'm probably going to get some early in the new year (2015) and hope the build quality is just as good, if not better than yours.
I'm probably going to get some early in the new year (2015) and hope the build quality is just as good, if not better than yours.

Tee-Forty- 3Silver

-
 Status :
 Online Offline
Number of posts : 245
Registration date : 2013-06-21
 Re: Fitted new downpipes.
Ahhh, I've got a set of them in a box that I bought back in 08/09 to force myself in to a rebuild.
AAAAAAAND they are still sat in the box, next to all the other boxes full of Thundercat bits
AAAAAAAND they are still sat in the box, next to all the other boxes full of Thundercat bits

stretchie_- 4Gold

-
 Status :
 Online Offline
Number of posts : 1353
Hobbies : Bikes and 4X4's
Humour : Sarcastic... Oh and cheeky, VERY CHEEKY
Registration date : 2008-11-08
Page 1 of 1
Permissions in this forum:
You cannot reply to topics in this forum


